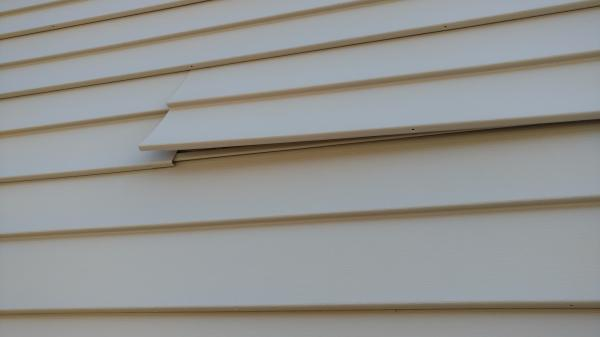
Loose siding not only detracts from the curb appeal of your home but can also lead to more significant problems if left unattended. As a responsible homeowner, addressing loose siding promptly is crucial to maintaining the structural integrity and aesthetic appeal of your property. At Malick Brothers Exteriors, we understand the importance of a well-maintained exterior, which is why we've put together this comprehensive guide on how to fix loose siding with ease.
Step 1: Inspect the Damage
The first step in fixing loose siding is to conduct a thorough inspection of the affected area. Carefully examine the siding to identify any loose or damaged pieces. Pay attention to signs of warping, cracks, or missing fasteners. Taking note of the extent of the damage will help you determine the appropriate course of action.
Step 2: Gather the Right Tools
Before you begin the repair process, make sure you have the necessary tools and materials on hand. Common tools required for fixing loose siding include a hammer, nails, pry bar, caulking gun, utility knife, and replacement siding pieces (if needed). Ensure your safety by using a sturdy ladder and work gloves during the repair.
Step 3: Remove Loose Siding
Using the pry bar, carefully remove the loose siding from its position. Gently slide the pry bar beneath the siding, being mindful not to cause additional damage. Once loosened, set the damaged piece aside for later inspection. If the siding is severely cracked or warped, it may be best to replace it entirely.
Step 4: Inspect and Repair Underlying Surface
After removing the loose siding, assess the condition of the underlying surface. Look for any signs of rot, moisture, or other damage that might have caused the siding to become loose in the first place. Repair any underlying issues to ensure a stable foundation for the new siding.
Step 5: Reattach the Siding
Using the hammer and nails, secure the loose siding back into place. Drive the nails through the nail slots in the siding, making sure to maintain a consistent and uniform appearance. For vinyl or other types of siding that do not use nails, follow the manufacturer's recommended installation method.
Step 6: Apply Caulk (if necessary)
If there are gaps or cracks between the siding pieces, use a caulking gun to apply an exterior-grade caulk. Caulking will prevent water from seeping behind the siding and causing potential damage.
Step 7: Replace Damaged Siding (if needed)
If the siding is beyond repair or severely damaged, replace it with a new piece that matches the existing siding material, style, and color. Carefully secure the replacement siding using the appropriate installation method.
Step 8: Paint and Finish
If your siding requires painting, ensure that the repair area matches the surrounding siding. Apply a fresh coat of paint to blend the repaired section seamlessly with the rest of the exterior.
Step 9: Regular Maintenance
To prevent future issues with loose siding, perform routine maintenance checks on your home's exterior. Inspect the siding at least once a year for any signs of wear and tear, and address any problems immediately.
At Malick Brothers Exteriors, we understand that homeowners take pride in maintaining their homes. Following these simple steps will help you fix loose siding efficiently, but remember, if the damage is extensive or you encounter any difficulties, don't hesitate to reach out to our professional team for expert assistance.
Enjoy a well-maintained and attractive home with Malick Brothers Exteriors – your trusted partner in exterior repair and renovation.

