Table of Contents
After a roofing project wraps up, most homeowners feel a sense of relief. The tarps are gone, the crew has packed up, and the new roof looks clean from the driveway. But looks can be deceiving. Shoddy workmanship does not always announce itself right away. Sometimes it takes a single hard rain or a cold Pennsylvania winter to reveal what a careless contractor left behind.
Knowing what to look for before you hand over that final check can save you thousands of dollars and a lot of frustration. This guide walks through the key signs of poor installation, contractor red flags, and what to do if something feels off. Whether you are working with a Sewickley roofer for the first time or have had past work done, these are the things worth reviewing before you sign off.
How Can You Tell If a Roofing Job Is Bad?
The honest answer is that some defects are obvious and others are buried in details most homeowners never think to check. A poorly installed roof can look fine from the street while hiding moisture problems in the attic, missing metal components along the edges, or fasteners that were placed incorrectly. Understanding what quality workmanship looks like is the first step to catching problems early.
In the Pittsburgh area, climate plays a role too. Freeze-thaw cycles, heavy snow loads, and wet springs are unforgiving of shortcuts. Work that might hold up in a milder region can fail within one season here. A proper roofing inspection Sewickley PA homeowners arrange before final payment is one of the best decisions you can make.
Ground-Level Red Flags Worth Noticing Right Away
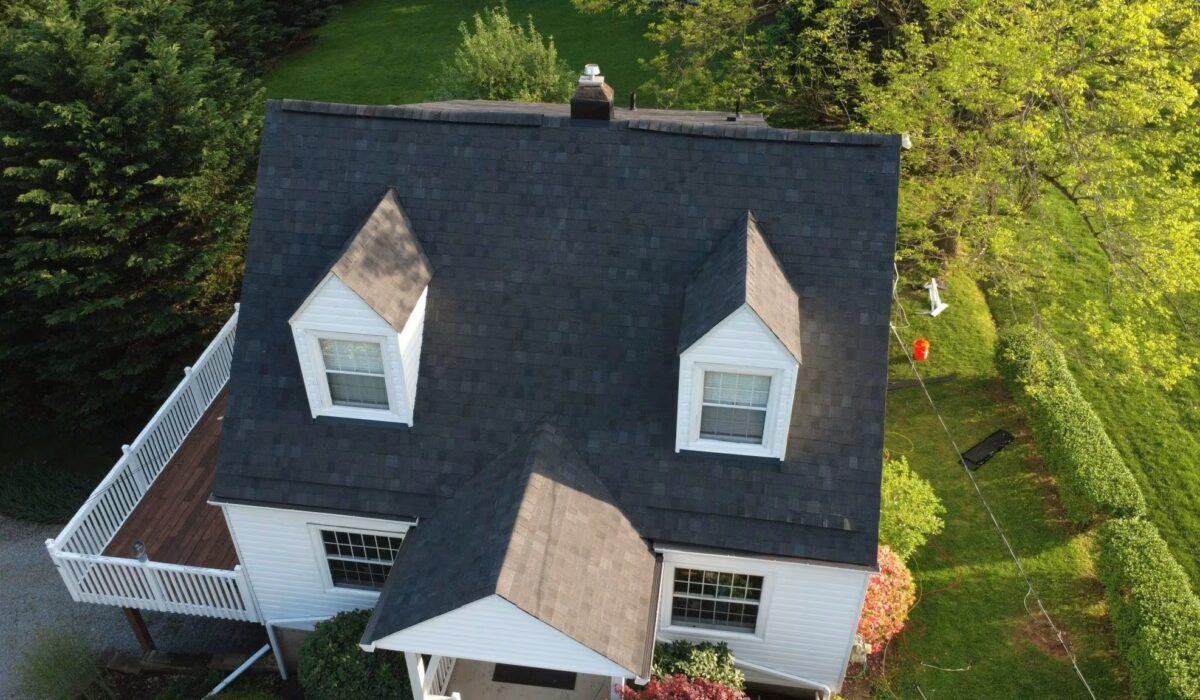
You do not need to climb a ladder to catch several warning signs. Stand across the street from your home and take a long, honest look at the roofline. It should be straight. If you notice any dips, sags, or waves along the ridge or eaves, that points to a failure in framing inspection or improper deck support during installation.
Shingles should run in clean, parallel lines from the eaves to the peak. Crooked rows or inconsistent spacing indicate the crew skipped chalk lines, which is a basic step every professional should follow. Also look for mismatched shingles or color inconsistencies. These often mean the contractor used leftover materials from different batches rather than ordering what the job required.
Visible nails along the shingle surface are another red flag. Exposed fasteners corrode quickly and create entry points for water. Similarly, long straight cuts across shingles near the edge of the roof often mean the crew used the roof itself as a cutting board, a careless habit that damages the surrounding material.
How to Spot Bad Roofing Work Before You Pay: The Flashing Test
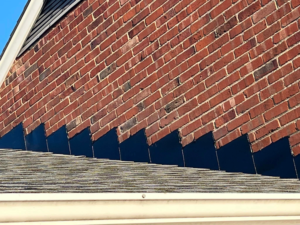
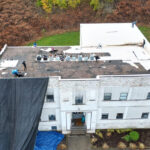
Flashing is the metal material installed around chimneys, vents, skylights, and in the valleys where two roof planes meet. It is one of the most leak-prone areas on any roof, and it is also where contractors sometimes cut corners by reusing old material instead of installing new. Rusted or visibly dirty metal around any of these areas after a new installation is a clear sign the contractor recycled old flashing.
New flashing should look clean and properly sealed. Any gaps, lifted edges, or dried-out caulk around chimney bases or pipe boots deserve a closer look. If the contractor skipped proper step flashing along a dormer wall or applied only caulk where metal should be, you will likely be scheduling a roof repair Sewickley within a year or two.
Do Not Overlook the Drip Edge
The drip edge is a metal strip installed along the roof’s perimeter that guides water off the edge and into the gutters rather than behind them. Its absence is surprisingly common on rushed jobs. Without it, water can wick back under the shingles or behind the fascia boards, eventually causing rot. Walk around the perimeter of your home after the job is complete and confirm the drip edge is visible and properly secured.
What the Attic Can Tell You
One of the most underrated inspection steps is heading into the attic on a bright day and simply looking up. If daylight is visible through the roof decking, there are gaps that should not be there. Water stains, new dark spots, or any trace of moisture around chimney bases and vent pipes are signs of a compromised installation.
Ventilation is another detail that gets ignored more often than it should. A properly installed roof requires a balance between intake ventilation at the soffits and exhaust ventilation at the ridge. When that balance is off, moisture and heat build up in the attic, leading to premature shingle failure, mold growth, and higher energy bills. Ask the contractor specifically what ventilation changes were made during the project.
Red Flags Table: Quick Reference Before Final Payment
| What to Check | What Good Looks Like | What Bad Looks Like |
|---|---|---|
| Shingle alignment | Straight, parallel rows | Wavy or crooked lines |
| Flashing | New, clean, properly sealed | Rusted, reused, or caulk-only |
| Drip edge | Visible metal strip along all edges | Missing or improperly overlapped |
| Exposed nails | None visible on finished surface | Nails visible on shingles |
| Attic | No daylight, no new stains | Light gaps, moisture, dark spots |
| Ventilation | Balanced intake and exhaust | No change made, soffits blocked |
| Permits | Pulled and inspected | No permit pulled |
What Time of Year Is the Cheapest to Replace a Roof?
Late fall and winter tend to bring the most competitive pricing from roofing contractors in the Pittsburgh area. Demand slows, crews are more available, and some companies offer off-season discounts to keep work on the schedule. That said, temperature matters for installation. Most asphalt shingles should be installed above 40 degrees Fahrenheit to seal properly, which means true winter work in western Pennsylvania carries some additional risk.
Early spring and late summer are often the sweet spot: weather is cooperative, contractors are active but not yet swamped by storm-season demand, and lead times are shorter. If you are planning ahead rather than replacing a damaged roof on a deadline, getting quotes in February or March can give you more leverage in price negotiations.
Contractor Red Flags That Should Give You Pause
A large upfront payment demand is one of the clearest warning signs. A reputable contractor typically asks for 10 to 15 percent at signing, with the remainder due after the work passes inspection. If someone is asking for 50 percent or more before the first shingle is laid, treat that as a serious concern.
Contractors who do not pull permits are another red flag. In Allegheny County, roofing work generally requires a permit so that the job can be inspected to meet local code. Skipping this step protects the contractor, not you. If something goes wrong and no permit was pulled, you may face complications with your homeowner’s insurance or when selling the home.
Storm chasers, contractors who appear after major weather events and push for quick decisions, are common in the greater Pittsburgh area. They often offer unusually low bids, pressure for same-week signing, and then deliver work that fails within a season or two. If you are sorting through bids after a storm, take the time to verify references and licensing before committing. For more guidance on spotting contractor problems before they start, Roofing Red Flags to Watch For When Buying a Home in Pittsburgh covers additional scenarios worth reviewing.
How to Spot Bad Roofing Work Before You Pay: Steps Before Signing Off
Request a final walkthrough with the contractor before you issue the final check. Have them walk you through the completed work and explain any areas where the scope changed from the original estimate. This also gives you the opportunity to raise concerns in person before the crew leaves the site.
Ask for lien waivers before final payment. These confirm that the contractor has paid their suppliers and subcontractors. Without them, a materials supplier could place a lien on your home if the contractor fails to pay their bill, even after you have paid in full. It is an uncommon situation, but a legitimate one.
If anything still feels uncertain after the walkthrough, consider hiring an independent roofing inspector before final payment. A third-party inspection typically costs $150 to $300 and can surface issues that would cost far more to fix after the fact.
Finally, review your warranty documentation carefully. You should have two separate warranties: the manufacturer’s warranty on the shingles themselves, and the contractor’s workmanship warranty. Get both in writing. A contractor who hesitates to provide a workmanship warranty is signaling something about the confidence they have in their own work.