Getting a new roof is one of the biggest investments you’ll make as a property owner. Whether you’re managing a home or overseeing a commercial building, understanding what goes into a proper roof installation can save you thousands of dollars and years of headaches. This guide breaks down every component you should expect, so you can hold your contractor accountable and ensure nothing gets overlooked.
A complete new roof checklist covers far more than just the shingles you see from the street. There are multiple layers working together to protect your building from water, wind, and extreme temperatures. Let’s walk through each one.
What Is Typically Included in a Roof Replacement?
A full roof replacement includes the removal of all existing materials down to the wood decking. From there, your contractor should inspect and repair any damaged decking before installing new underlayment, flashing, ventilation, and your chosen roofing material. Each layer serves a specific purpose in the overall system.
Many property owners assume a new roof just means new shingles. That’s a costly misconception. The roofing components beneath the surface are what actually determine how long your roof will last and how well it performs during storms. Skipping any of these elements puts your entire investment at risk.
Understanding Wood Decking: The Foundation of Your Roof
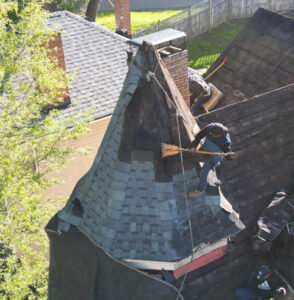
Wood decking is the structural base that everything else attaches to. Most residential and commercial buildings use OSB (oriented strand board) or CDX plywood in half-inch thickness. During tear-off, your contractor should carefully inspect every section of decking for soft spots, rot, or water damage.
Replacing damaged decking is not optional. If your contractor tries to install new materials over compromised wood, you’re setting yourself up for premature failure. A solid foundation is where every successful roof installation begins.
Choosing the Right Underlayment for Weather Protection
The underlayment is your first line of defense against moisture. It goes directly over the wood decking and acts as a barrier between the structural layer and your roofing materials. Today, synthetic underlayment has largely replaced traditional organic felt because it’s lighter, stronger, and more durable.
This layer also protects your building during the installation process. If an unexpected rainstorm hits while the roof is exposed, quality underlayment keeps water from reaching the interior. For any commercial roofing checklist, underlayment should be near the top.
Ice and Water Shield: Extra Protection Where It Matters Most
Ice and water shield is a rubberized membrane that gets installed in the areas most likely to leak. Think valleys, around pipes and vents, skylights, chimneys, and along the roof edges. These are the spots where water tends to pool or penetrate, so extra protection is essential.
Here’s something most homeowners don’t know: some insurance companies offer discounts of up to 27% on your premium if you install ice and water shield across the entire roof. It’s worth asking your contractor about full coverage, not just the minimum required areas.
What Does a Roof Plan Typically Include?
A proper roof plan maps out every detail before work begins. This includes measurements, material specifications, ventilation placement, and flashing locations. Your contractor should provide this documentation so you know exactly what you’re paying for.
The plan should also account for any unique features of your building. Dormers, skylights, chimneys, and HVAC penetrations all require special attention. Without a detailed plan, installers may cut corners or make decisions on the fly that compromise quality. For more guidance on planning your project, check out Getting a New Roof: Essential Guide for Homeowners.
Essential Flashing Types for a Watertight Seal
Flashing is the metal component that seals transitions and penetrations throughout your roof. Without proper flashing, water will find its way into your building at every joint and edge. Here’s a breakdown of the main types:
| Flashing Type | Location | Purpose |
|---|---|---|
| Drip Edge | Roof edges along fascia | Directs water away from fascia and into gutters |
| Pipe Vent Flashing | Around plumbing pipes | Seals penetrations from bathroom and kitchen vents |
| Mechanical Vent Flashing | HVAC, dryer, exhaust vents | Protects openings for mechanical equipment |
| Step Flashing | Walls, dormers, chimneys | Prevents water entry at vertical transitions |
| Valley Flashing | Where two roof planes meet | Channels water down valleys without leaking |
Common flashing materials include pre-painted steel, aluminum (best for coastal areas), copper, and galvalume. Your contractor should use ice and water shield underneath every piece of flashing for maximum protection.
What Is the Most Expensive Part of a New Roof?
Labor typically accounts for 40 to 60 percent of your total roof replacement cost. The complexity of your roof design directly impacts this number. Multiple valleys, steep pitches, dormers, and penetrations all add time and difficulty to the installation.
Materials come second. Premium shingles, metal roofing, or tile will obviously cost more than basic asphalt. However, don’t let price alone drive your decision. Cheaper materials often mean shorter lifespans and more frequent repairs. According to the National Roofing Contractors Association, investing in quality materials and proper installation pays off significantly over time.
Ventilation: The Key to Roof Longevity
Proper ventilation is one of the most overlooked roof installation steps. Without adequate airflow, your attic traps heat and moisture, which accelerates the breakdown of roofing materials from underneath. This is the leading cause of premature roof failure.
Common ventilation options include ridge vents, soffit vents, gable vents, and powered attic fans. The goal is to create a balanced system where cool air enters at the soffits and warm air exits at the ridge. Your contractor should calculate the required ventilation based on your attic square footage.
What’s Included in a Roof Inspection?
A thorough roof inspection examines every component we’ve discussed. The inspector will check the condition of your decking, underlayment, flashing, ventilation, and surface materials. They’ll also look for signs of water damage in the attic and around penetrations.
You should request an inspection before starting any replacement project. This gives you a clear picture of what needs attention and helps you compare contractor bids accurately. After installation, a final inspection confirms everything was done correctly.
Final Thoughts on Your New Roof Checklist
A complete roof replacement is a system, not just a surface. Every component matters. From the wood decking foundation to the ventilation at the ridge, each layer works together to protect your property for decades.
Don’t accept a bid that only mentions shingles or surface materials. Ask questions. Request documentation. And make sure your contractor addresses every item on this new roof checklist. Your roof is too important to leave anything to chance.