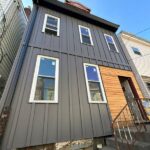
Vinyl siding looks simple enough from the outside. Clean lines, uniform panels, a straightforward snap-and-nail system. That simplicity tricks a lot of homeowners and even some contractors into thinking the job is foolproof. It is not. One small oversight can snowball into warped walls, trapped moisture, and repairs that cost more than the original project.
The reality is that vinyl siding installation mistakes are incredibly common. Most come down to misunderstanding how the material behaves. Vinyl moves. It expands in heat and contracts in cold. If you do not install it with that movement in mind, you are setting yourself up for failure.
Why Nailing Too Tightly Is the Most Common Mistake When Installing Vinyl Siding
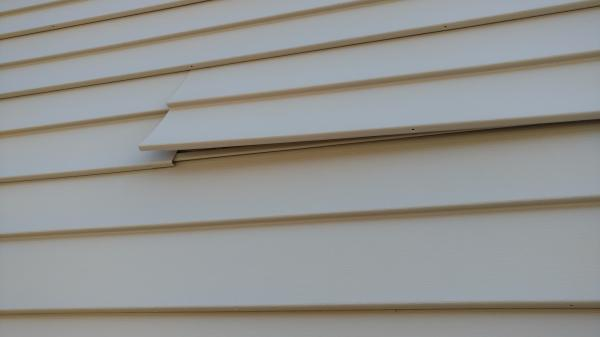
Ask any experienced siding contractor what goes wrong most often, and you will hear the same answer: nails driven too tight. When nails are hammered flush against the nailing hem, the panel cannot slide back and forth as temperatures change. The result is buckling, warping, and cracking.
The fix is simple. Leave roughly 1/32 to 1/16 of an inch between the nail head and the siding. That tiny gap allows the panel to float on the wall. Every nail should sit in the center of the slotted hole, not off to one side.
Skipping the Moisture Barrier Behind the Panels
Here is something a lot of DIY installers miss: vinyl siding is not waterproof. Water gets behind the panels, and that is actually by design. The system relies on a water-resistive barrier, often called house wrap, to protect the sheathing and framing underneath.
Skipping this step is one of the most damaging siding installation errors you can make. Without a proper barrier, moisture sits against the wood sheathing and leads to rot, mold, and structural decay. By the time you notice, you are looking at wall repairs, not just a siding replacement.
The Most Common Mistake When Installing Vinyl Siding: Ignoring Expansion Gaps
Vinyl panels can change length by as much as 5/8 of an inch between summer and winter. If you butt panels tightly against J-channels, corner posts, or window trim, they have nowhere to go when the temperature climbs. They buckle outward.
Most manufacturers recommend leaving about 1/4 inch of clearance at receiving channels above 40 degrees Fahrenheit. Below 40 degrees, that gap should increase to 3/8 of an inch. These are requirements, not suggestions.
How a Crooked Starter Strip Ruins the Entire Wall
The starter strip is where everything begins. It is a thin piece of trim along the bottom of the wall that the first row of siding hooks into. If it is not perfectly level, every row above it drifts further out of alignment.
Good installers snap a level chalk line around the perimeter of the house before attaching the starter strip. This takes extra effort up front but saves hours later. The strip should also hang at least one inch below the top of the foundation for proper weather protection.
When Installing Vinyl Siding, Do You Start at the Top or Bottom?
This question comes up constantly. You always start at the bottom and work your way up. Each row locks into the one below it, creating a secure, interlocking system that sheds water effectively. Starting from the top would leave panels unsupported at the locking seams.
Professional installers also recommend starting each row on the side of the house that faces away from the street. The overlap between panels becomes less visible from the most common viewing angle.
How to Tell If Vinyl Siding Is Installed Correctly
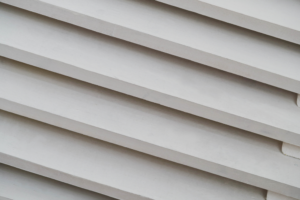
There are a few quick checks that reveal whether the work was done right. Gently push a panel side to side. It should move freely, about half an inch in each direction. If it feels rigid and locked in place, the nails are too tight.
Panels should overlap by at least one inch and sit flat without waves or ripples. Check around windows and doors for consistent spacing and properly installed J-channel. If you notice buckling, gaps, or misaligned rows, these are signs of vinyl siding DIY problems that need attention. For more answers about exterior projects, visit the Frequently Asked Questions About Our Roofing and Exterior Services page.
Common Vinyl Siding Installation Mistakes at a Glance
| Mistake | What Happens | How to Prevent It |
|---|---|---|
| Nailing too tightly | Buckling, warping, cracking | Leave 1/32″ to 1/16″ gap between nail head and panel |
| No expansion gaps | Panels push against trim and buckle | Leave 1/4″ clearance at all receiving channels |
| Skipping house wrap | Moisture damage, rot, mold | Install a water-resistive barrier before siding |
| Crooked starter strip | Entire wall misaligned | Snap a level chalk line and verify before nailing |
| Wrong nail placement | Cracked panels, uneven movement | Center nails in slots, space every 16 inches |
| No window flashing | Water infiltration behind J-channel | Install felt paper flashing at bottom window corners |
What Time of Year Is Best to Replace Siding?
Timing matters more than most people expect. Vinyl siding should ideally be installed when outdoor temperatures are between 50 and 80 degrees Fahrenheit. That puts spring and fall at the top of the list. In extreme heat, vinyl expands significantly, making measurements unreliable. In freezing cold, it becomes brittle and can crack during cutting or nailing.
Fall tends to be the sweet spot. Temperatures are moderate, demand for contractors drops, and many suppliers discount inventory to make room for new stock. According to Fixr.com, contractors often charge less during slower months. Booking in early fall or late spring typically gives the best balance of weather, pricing, and availability.
The Most Common Mistake When Installing Vinyl Siding Comes Down to Preparation
Most siding installation errors are not caused by bad materials. They are caused by rushing prep work. Skipping window flashing, leaving out house wrap, or neglecting to check alignment every few rows are shortcuts that lead to expensive problems.
If you are considering a DIY approach, read the manufacturer’s installation guide cover to cover. Ignoring product-specific requirements can void your warranty entirely. And if the scope feels overwhelming, hiring a qualified contractor is almost always worth the investment.
Protecting Your Home Starts with Proper Installation
Vinyl siding remains one of the most popular cladding options for good reason. It is affordable, durable, and low maintenance when installed correctly. But vinyl siding installation mistakes are surprisingly easy to make. Each error chips away at the protection your home depends on.
Understanding these pitfalls puts you in a stronger position. You will know what to look for, what questions to ask, and what standards to hold the work to.